How To Create a CSS Skeleton Animation in React js
August 12, 2024
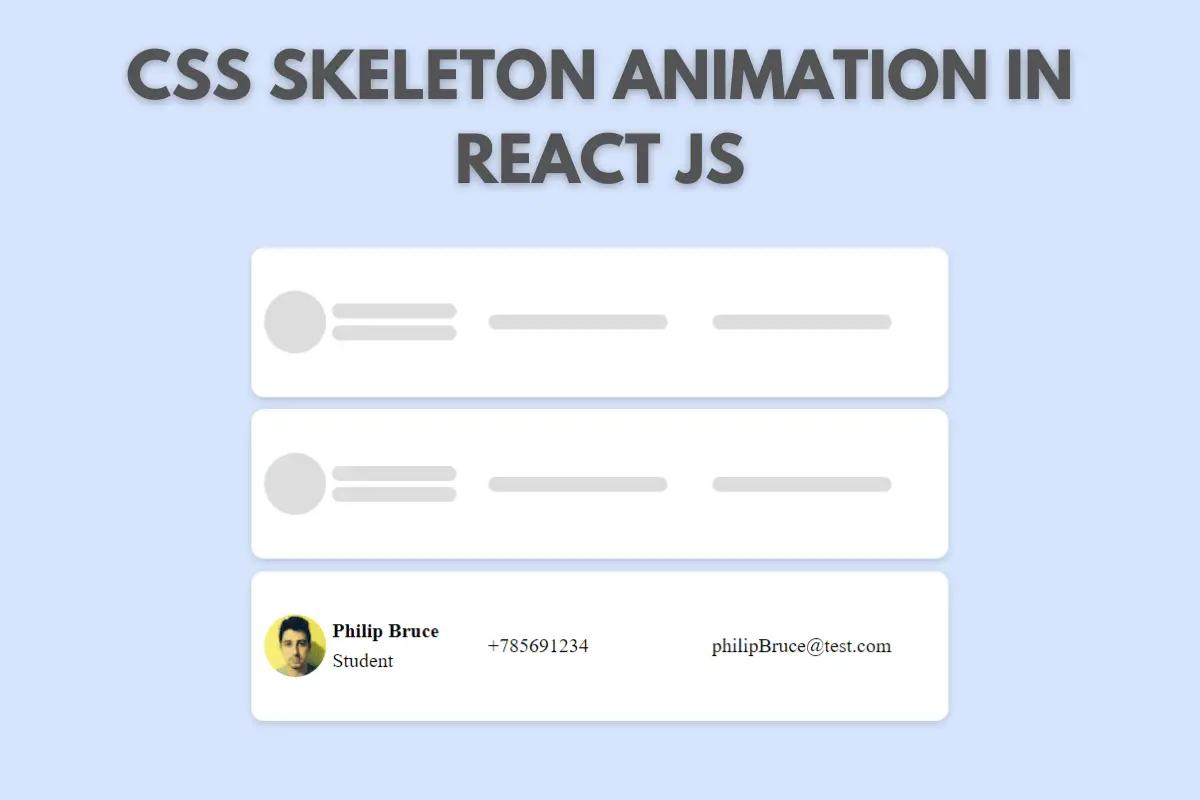
In this tutorial, we're going to see how we can create this awesome skeleton animation to show a loading animation for a list of users. By following this tutorial you'll be able to create shimmer animations for any HTML, so make sure to follow along.
For the final code click here.
1. Components Creation
After creating a react application, I will create the UsersList component in which I will return a simple h1 for now. I also created a CSS file and imported it in my component then I imported my component in the app.jsx file.
For this tutorial, I'll be working with this list of users:
const USERS = [
    {
        id: 1,
        fullName: 'Jhon Doe',
        phone: '+123456789',
        email: 'jhondoe@test.com',
        profession: 'Teacher',
        thumbnail: 'https://randomuser.me/api/portraits/thumb/men/82.jpg'
    },
    {
        id: 2,
        fullName: 'Jane Wayne',
        phone: '+789123456',
        email: 'Janewayne@test.com',
        profession: 'Student',
        thumbnail:'https://randomuser.me/api/portraits/thumb/women/35.jpg'
    },
    {
        id: 3,
        fullName: 'Philip Bruce',
        phone: '+785691234',
        email: 'philipBruce@test.com',
        profession: 'Student',
        thumbnail: 'https://randomuser.me/api/portraits/thumb/men/35.jpg'
    }
]
Let's start by rendering our list of users. To do so, change the JSX of UsersList component as follow:
import React from 'react'
import './UsersList.css'

const USERS = [
    {
        id: 1,
        fullName: 'Jhon Doe',
        phone: '+123456789',
        email: 'jhondoe@test.com',
        profession: 'Teacher',
        thumbnail: 'https://randomuser.me/api/portraits/thumb/men/82.jpg'
    },
    {
        id: 2,
        fullName: 'Jane Wayne',
        phone: '+789123456',
        email: 'Janewayne@test.com',
        profession: 'Student',
        thumbnail:'https://randomuser.me/api/portraits/thumb/women/35.jpg'
    },
    {
        id: 3,
        fullName: 'Philip Bruce',
        phone: '+785691234',
        email: 'philipBruce@test.com',
        profession: 'Student',
        thumbnail: 'https://randomuser.me/api/portraits/thumb/men/35.jpg'
    }
]

const UsersList = () => {

  return (
    <div className='UsersList'>
        <h1>UsersList</h1>

        <div className='body'>
            {
                USERS.map(user => (
                    <div className='user' key={user.id}>
                        <div className='data userInfos'>
                            <div className='imgContainer'>
                                <img src={user.thumbnail} alt={user.fullName} />
                            </div>
                            <div className='infosContainer'>
                                <div className='value'><b>{user.fullName}</b></div>
                                <div className='value'>{user.profession}</div>
                            </div>
                        </div>
                        <div className='data'>
                            <div className='value'>{user.phone}</div>
                        </div>
                        <div className='data'>
                            <div className='value'>{user.email}</div>
                        </div>
                    </div>
                ))
            }
        </div>
    </div>
  )
}

export default UsersList
Now let's go to our CSS file to add some styling to the user div. So, open UsersList.css and add these styles:
.UsersList{
max-width: 600px;
margin: auto;
}
.UsersList .body{
background-color: #d6E5fe;
padding: 20px;
}
.user{
background-color: #fff;
border-radius: 10px;
margin-bottom: 10px;
padding: 10px;
height: 100px;
display: flex;
align-items: center;
box-shadow: 0 2px 5px 1px rgb(64 60 67 / 16%);
}
.user .data{
flex: 1;
}
.user .data.userInfos{
display: flex;
align-items: center;
gap: 5px;
}
.user .data.userInfos .imgContainer{
width: 50px;
height: 50px;
border-radius: 50%;
overflow: hidden;
}
.user .data.userInfos .imgContainer img{
width: 100%;
}
.user .data.userInfos .infosContainer{
flex: 1;
}
.user .data .value + .value{
margin-top: 5px;
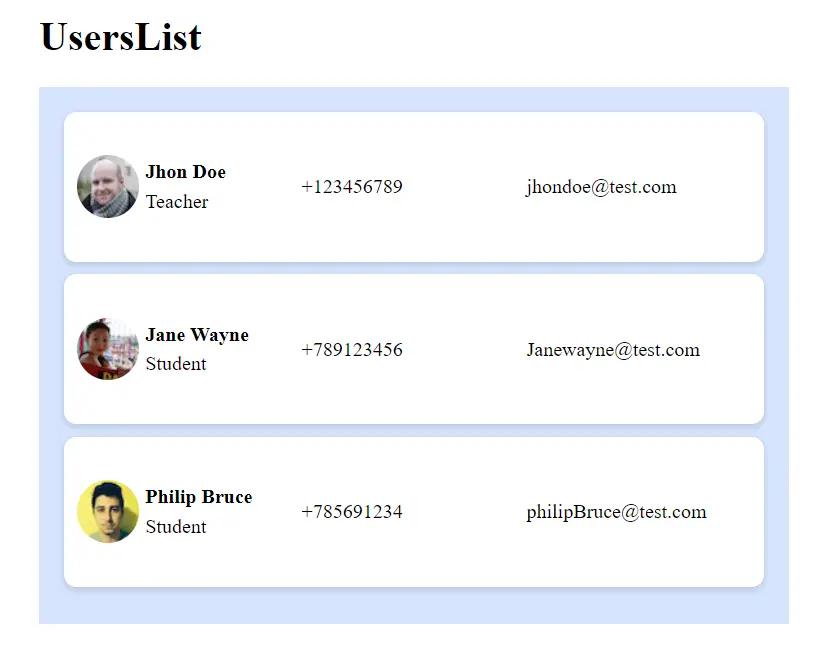
}With that our user div is done and you should have this result:
2. CSS Skeleton Animation
Now let's start working on the skeleton animation. For that create a loader component in which return the same markup used for the user div. So let's copy the HTML and get rid of the values. Make sure to add a Loader class name that we're gonna use for the animation.
Let's also add a state that we're going to use to display the loading UI.
import React, { useState } from 'react'
import './UsersList.css'

const USERS = [
    {
        id: 1,
        fullName: 'Jhon Doe',
        phone: '+123456789',
        email: 'jhondoe@test.com',
        profession: 'Teacher',
        thumbnail: 'https://randomuser.me/api/portraits/thumb/men/82.jpg'
    },
    {
        id: 2,
        fullName: 'Jane Wayne',
        phone: '+789123456',
        email: 'Janewayne@test.com',
        profession: 'Student',
        thumbnail:'https://randomuser.me/api/portraits/thumb/women/35.jpg'
    },
    {
        id: 3,
        fullName: 'Philip Bruce',
        phone: '+785691234',
        email: 'philipBruce@test.com',
        profession: 'Student',
        thumbnail: 'https://randomuser.me/api/portraits/thumb/men/35.jpg'
    }
]

const UsersList = () => {

    const [isLoading, setIsLoading] = useState(false);

  return (
    <div className='UsersList'>
        <h1>UsersList</h1>

        <div className='body'>
            {
                !isLoading ?
                data.map(user => (
                    <div className='user' key={user.id}>
                        <div className='data userInfos'>
                            <div className='imgContainer'>
                                <img src={user.thumbnail} alt={user.fullName} />
                            </div>
                            <div className='infosContainer'>
                                <div className='value'><b>{user.fullName}</b></div>
                                <div className='value'>{user.profession}</div>
                            </div>
                        </div>
                        <div className='data'>
                            <div className='value'>{user.phone}</div>
                        </div>
                        <div className='data'>
                            <div className='value'>{user.email}</div>
                        </div>
                    </div>
                )) : <>
                    <Loader />
                    <Loader />
                    <Loader />
                </>
            }
        </div>
    </div>
  )
}

const Loader = () => (
    <div className='user Loader'>
        <div className='data userInfos'>
            <div className='imgContainer value'>
            </div>
            <div className='infosContainer'>
                <div className='value'></div>
                <div className='value'></div>
            </div>
        </div>
        <div className='data'>
            <div className='value'></div>
        </div>
        <div className='data'>
            <div className='value'></div>
        </div>
    </div>
)

export default UsersList
Now let's add the Loader animation. So add these styles at the bottom of UsersList.css:
.Loader .value{
animation-duration: 2.2s;
animation-fill-mode: forwards;
animation-iteration-count: infinite;
animation-name: shimmer;
animation-timing-function: linear;
background: linear-gradient(to right, #F6F6F6 8%, #F0F0F0 18%, #F6F6F6 33%);
background-size: 1200px 100%;
height: 12px;
width: 80%;
border-radius: 8px;
}
@keyframes shimmer {
0% {
background-position: -1200px 0;
}
100% {
background-position: 1200px 0;
}
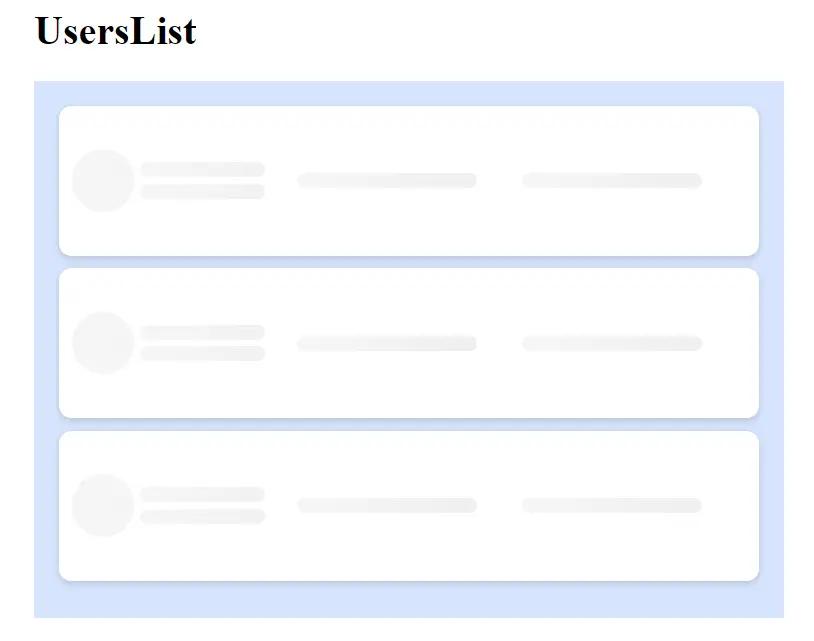
}If everything worked as expected, you should get the following visual:
3. Real World use case
In real-world scenarios, the skeleton animations are used to display a custom UI while we await the response from an API so let's simulate that.
Let's add another state data that will store the list of our users and let's map over the state data and not the variable USERS. Now I want to create a getData function to simulate our request so this function will return a promise that will resolve after 3 seconds using the setTimeout function.
In our UsersList component let's call the useEffect hook to get the users when the component mounts. To display the animation while we await the data, call setIsLoading before getData() and set it back to false after the promise resolves.
Check the final code below.
4. Conclusion
In this article, we went through the process of creating a custom CSS SKELETON ANIMATION. If you want to stay updated with our tutorials, bookmark our website. Don't forget also to check our FREE tools that will help you with your daily activities.
5. Final Code
5.1 UsersList.jsx
import React, { useEffect, useState } from 'react'
import './UsersList.css'

const USERS = [
    {
        id: 1,
        fullName: 'Jhon Doe',
        phone: '+123456789',
        email: 'jhondoe@test.com',
        profession: 'Teacher',
        thumbnail: 'https://randomuser.me/api/portraits/thumb/men/82.jpg'
    },
    {
        id: 2,
        fullName: 'Jane Wayne',
        phone: '+789123456',
        email: 'Janewayne@test.com',
        profession: 'Student',
        thumbnail:'https://randomuser.me/api/portraits/thumb/women/35.jpg'
    },
    {
        id: 3,
        fullName: 'Philip Bruce',
        phone: '+785691234',
        email: 'philipBruce@test.com',
        profession: 'Student',
        thumbnail: 'https://randomuser.me/api/portraits/thumb/men/35.jpg'
    }
]

const getData= () => new Promise((resolve, reject) => {
    setTimeout(() => {
        resolve(USERS);
    }, 3000);
})

const UsersList = () => {

    const [isLoading, setIsLoading] = useState(false);
    const [data, setData] = useState([]);

    useEffect(() => {

        setIsLoading(true);
        getData().then(res => {
            setData(res);
            setIsLoading(false);
        })
    }, [])

  return (
    <div className='UsersList'>
        <h1>UsersList</h1>

        <div className='body'>
            {
                !isLoading ?
                data.map(user => (
                    <div className='user' key={user.id}>
                        <div className='data userInfos'>
                            <div className='imgContainer'>
                                <img src={user.thumbnail} alt={user.fullName} />
                            </div>
                            <div className='infosContainer'>
                                <div className='value'><b>{user.fullName}</b></div>
                                <div className='value'>{user.profession}</div>
                            </div>
                        </div>
                        <div className='data'>
                            <div className='value'>{user.phone}</div>
                        </div>
                        <div className='data'>
                            <div className='value'>{user.email}</div>
                        </div>
                    </div>
                )) : <>
                    <Loader />
                    <Loader />
                    <Loader />
                </>
            }
        </div>
    </div>
  )
}

const Loader = () => (
    <div className='user Loader'>
        <div className='data userInfos'>
            <div className='imgContainer value'>
            </div>
            <div className='infosContainer'>
                <div className='value'></div>
                <div className='value'></div>
            </div>
        </div>
        <div className='data'>
            <div className='value'></div>
        </div>
        <div className='data'>
            <div className='value'></div>
        </div>
    </div>
)

export default UsersList
5.2 UsersList.css
.UsersList{
  max-width: 600px;
  margin: auto;
}

.UsersList .body{
  background-color: #d6E5fe;
  padding: 20px;
}

.user{
  background-color: #fff;
  border-radius: 10px;
  margin-bottom: 10px;
  padding: 10px;
  height: 100px;
  display: flex;
  align-items: center;
  box-shadow: 0 2px 5px 1px rgb(64 60 67 / 16%);
}

.user .data{
  flex: 1;
}

.user .data.userInfos{
  display: flex;
  align-items: center;
  gap: 5px;
}

.user .data.userInfos .imgContainer{
  width: 50px;
  height: 50px;
  border-radius: 50%;
  overflow: hidden;
}

.user .data.userInfos .imgContainer img{
  width: 100%;
}

.user .data.userInfos .infosContainer{
  flex: 1;
}

.user .data .value + .value{
  margin-top: 5px;
}

.Loader .value{
  animation-duration: 2.2s;
  animation-fill-mode: forwards;
  animation-iteration-count: infinite;
  animation-name: shimmer;
  animation-timing-function: linear;
  background: linear-gradient(to right, #F6F6F6 8%, #F0F0F0 18%, #F6F6F6 33%);
  background-size: 1200px 100%;
  height: 12px;
  width: 80%;
  border-radius: 8px;
}

@keyframes shimmer {
  0% {
    background-position: -1200px 0;
  }
  100% {
    background-position: 1200px 0;
  }
}

